SkyVPN is a Virtual Private Network (VPN) that can be used as an app on smartphones, PC, and other devices with operating systems of iOS or Android, Windows, and Mac. Up to now, SkyVPN has been used by millions of users around the world due to its Excellent Performance, High Connection Speed, easiness of use, and High-Security Protocols.
It’s quite simple to use SkyVPN. Here’s a tutorial that will show you how to download, set up, and use SkyVPN on Windows 7 or above. Also, a few tips on how to better use SkyVPN Premium service will be introduced at the end of this article.
Download and Install SkyVPN on Windows 7 and Above in 2021
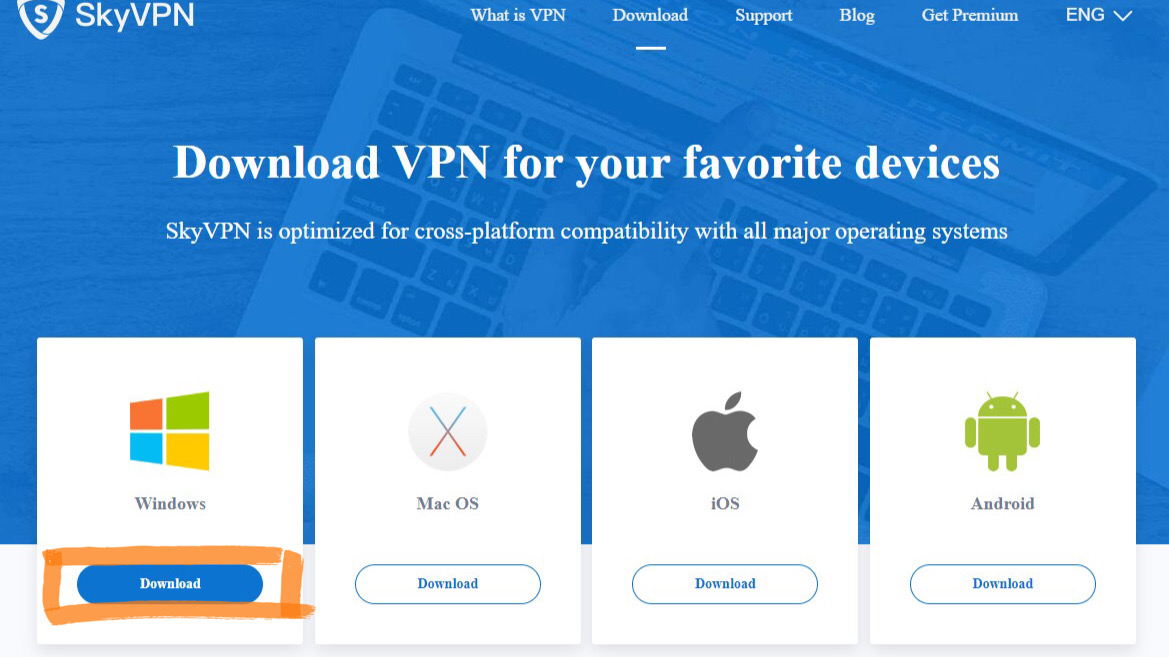
Step#1. Download SkyVPN setup package from SkyVPN official website.
Step#2. Setup SkyVPN on Windows.
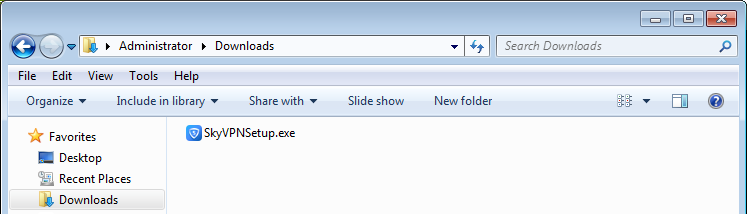
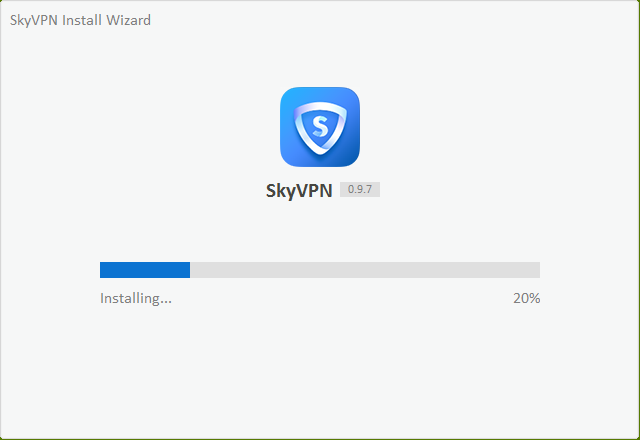
Double click the set-up package to start the installing of SkyVPN on your Windows.
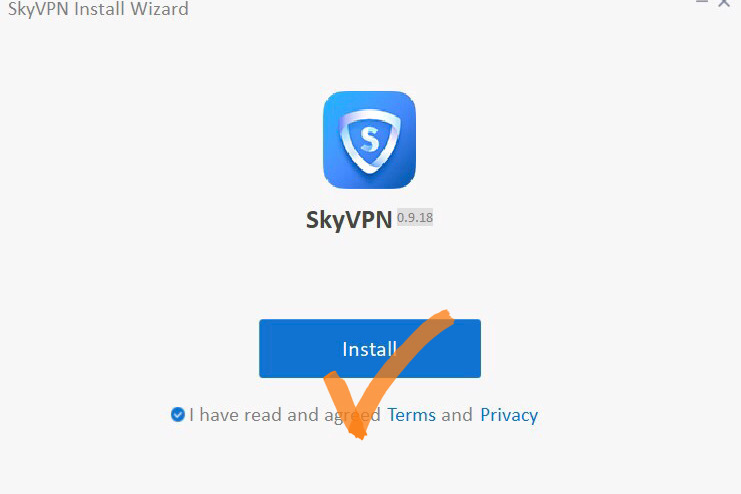
A pop-up window will guide you to install the app. Before installing, please read the “Terms” and “Privacy”, and click “√” if you agree to it. Then click “install”.
Then it will take a few seconds to complete installing SkyVPN app on Windows.
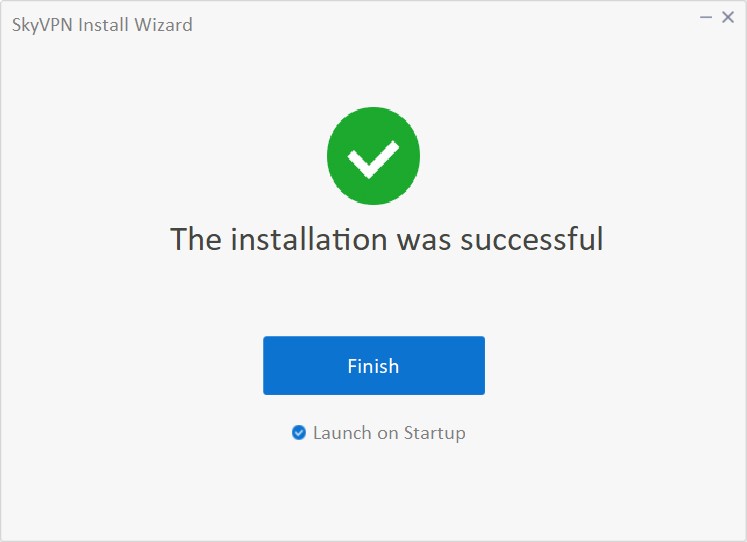
After a successful installation, it will give you a reminder. Just click “Finish” to complete the installation process and enjoy SkyVPN.
How to Use SkyVPN Premium on Windows 7 or Above in 2021
Step#1. Register and Login
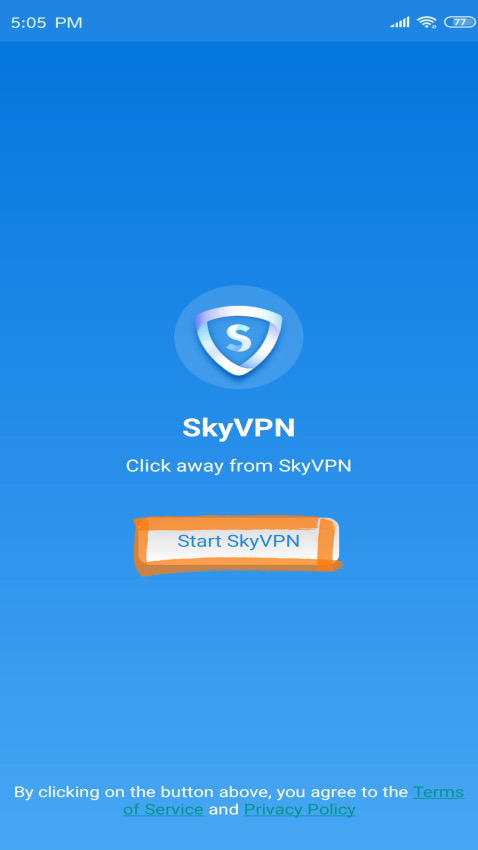
After installing SkyVPN app, you will see a shortcut on your computer desktop. Double click the shortcut, a welcome screen will show up. Click “Start SkyVPN” to continue.
Tap the sidebar menu on the upper left corner.
First users of SkyVPN should tap “Sign Up” for registration of SkyVPN account while old users should tap “Log In” directly to SkyVPN account.
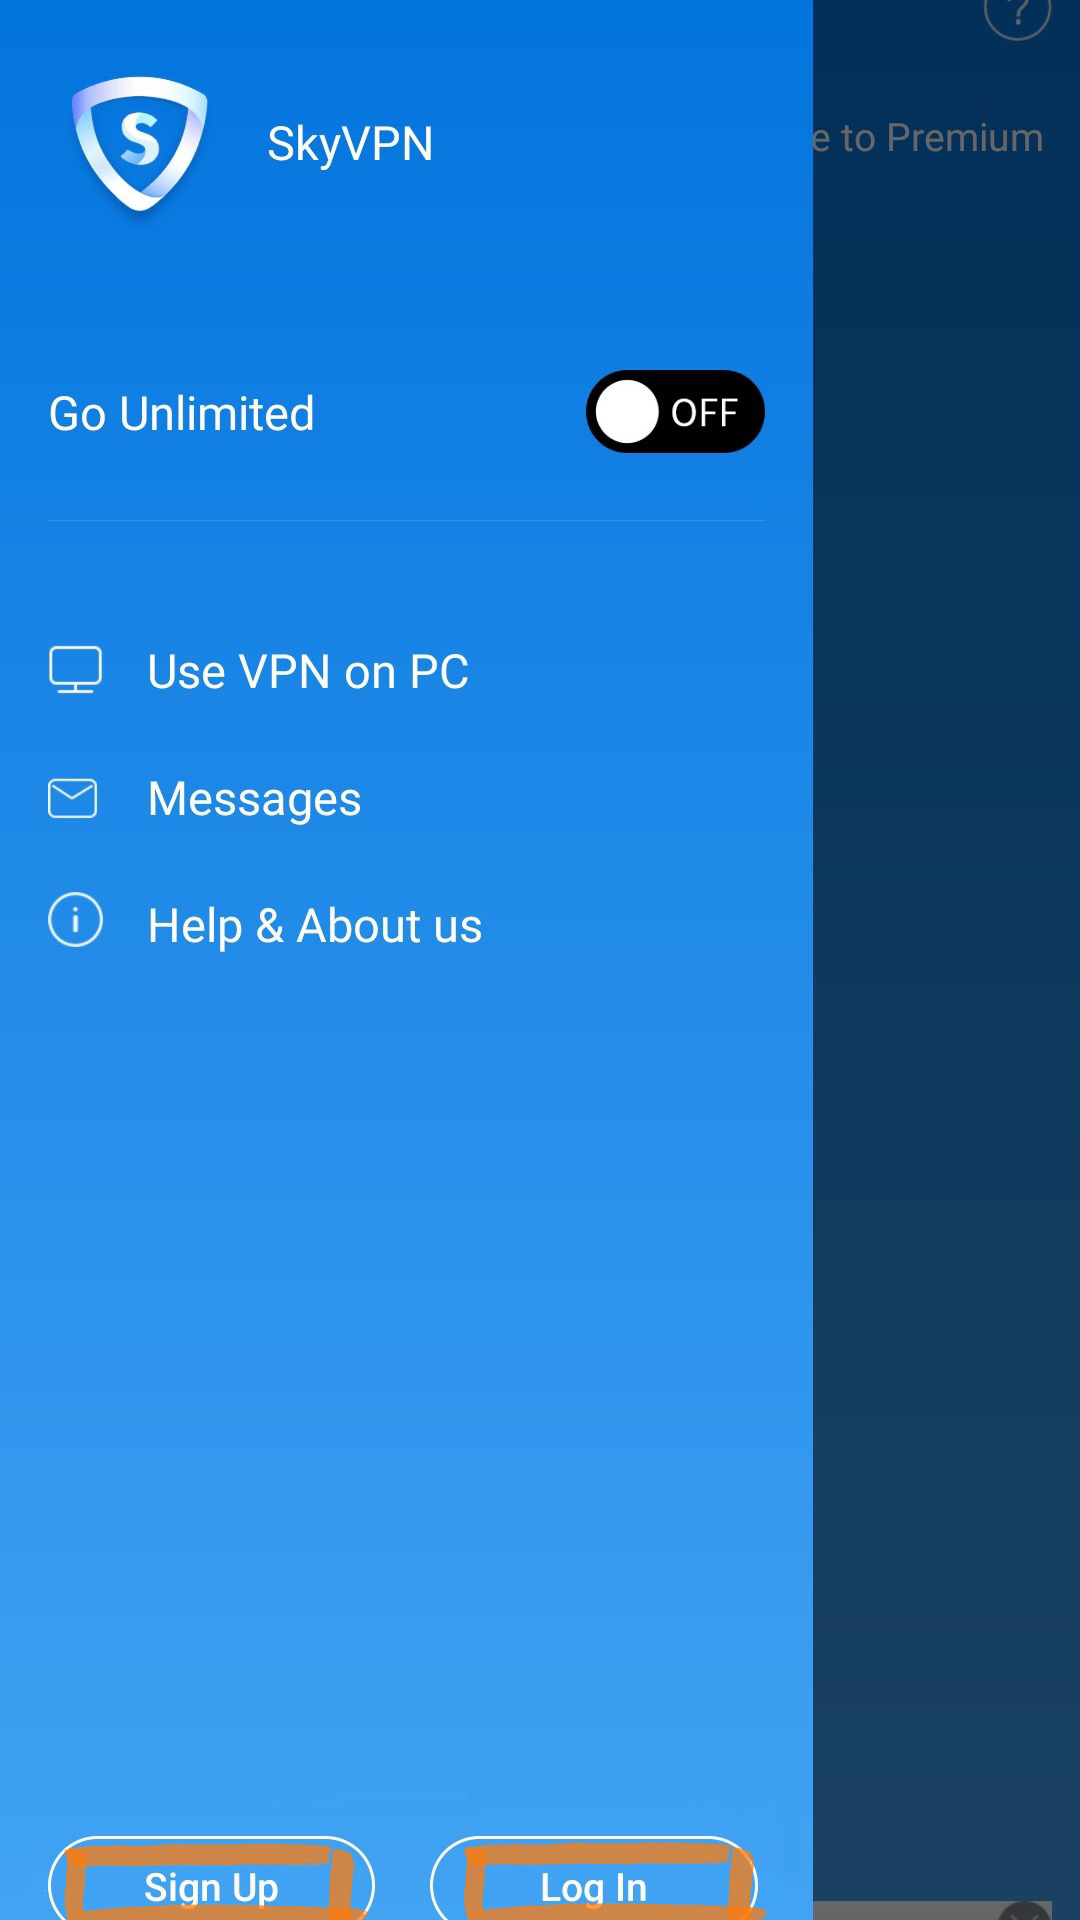
SkyVPN registration and login call for your email address and password, so please ensure you have an valid email address.
Step#2. Connect and Disconnect SkyVPN
All the preparation work has been finished, now it’s time to enjoy SkyVPN! To connect to a VPN server location, tap the “Connect” button at the center of the interface.
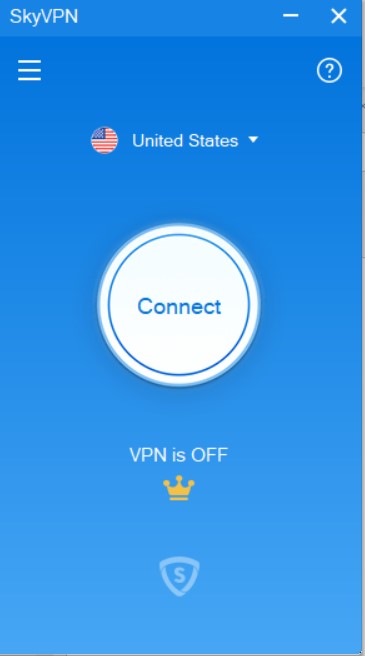
Once you see the “VPN is ON” message on the app screen, you can begin surfing with freedom and security!
To disconnect from the VPN server, tap the “Disconnect” button while the VPN is connected.
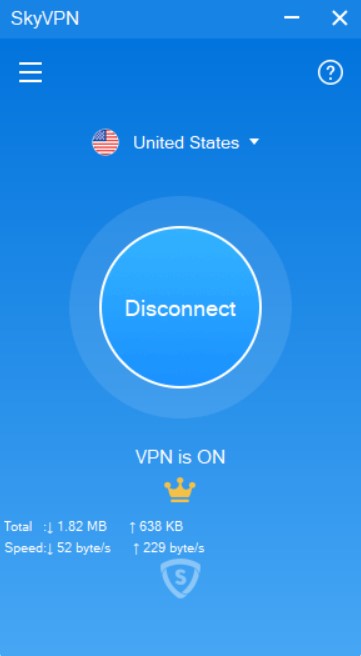
You will know you are disconnected when the “VPN is OFF” message is shown.
Choose a different VPN server location
To connect to a different server location, click on the ‘Country name’.
Then, choose a server location, click on it, and SkyVPN will automatically reconnect you to the new server location.

Can’t-Miss Features for SkyVPN Premium on Windows in 2021
Feature 1: DNS Leak Test
DNS plays an important role in safeguarding your cybersecurity. If DNS leaks, your online data will be stolen, and your Internet security will be threatened. However, this issue can be solved when you connect SkyVPN because we have a DNS leak test. SkyVPN DNS server will transmit the correct IP address to the VPN server, then it will be returned to your device as final feedback. Most importantly, the DNS leak test feature on SkyVPN is FREE.
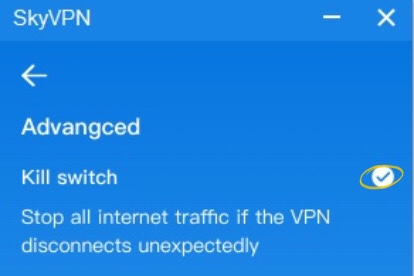
Feature 2:Kill Switch
A kill switch is a special feature that further safeguards users’ cybersecurity when connected VPN. When your VPN connection is cut mostly due to uncertain causes, a kill switch will immediately stop your network connection and protect your information. Not all VPNs have a kill switch feature. SkyVPN for Windows has the kill switch function, and we have both free versions and subscription versions. For the free version, the kill switch feature can be only compatible with an internet connection only. For the subscription version, however, you can enable the kill switch function to specified apps on your devices.
To enable the kill switch feature on SkyVPN for Windows, you should conform to the following steps:
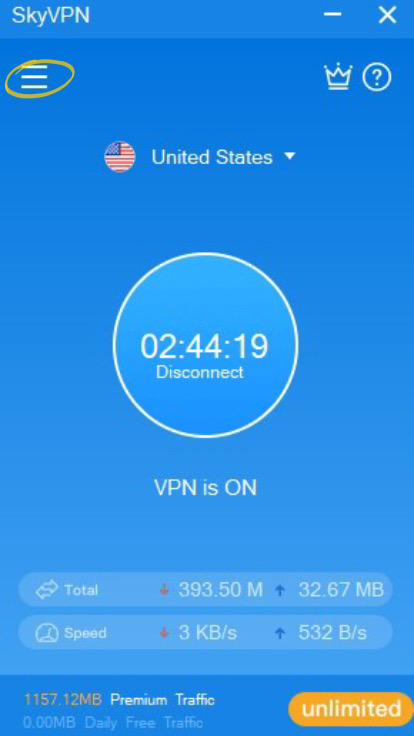
Step#1. Tap the menu icon at the left upper corner of the main interface.
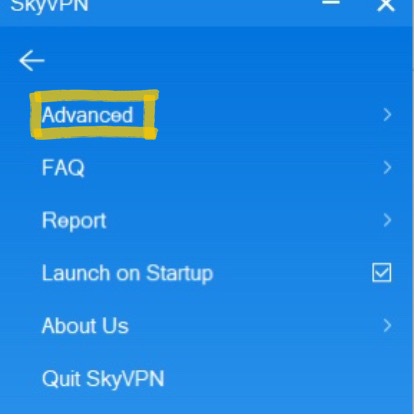
Step#2. Tap “Advanced” to enter all advanced features of SkyVPN.
Step#3. Tick the kill switch function to complete your setting.
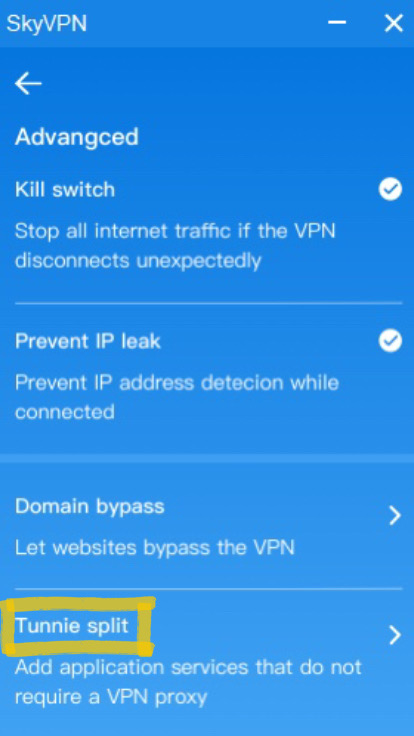
Feature 3: Split Tunnel
VPN split tunnel allows partial devices, websites, or applications to go through the encrypted tunnel while the rest of the devices, websites, or applications directly get connected to the internet. For example, a split-tunneling VPN allows you to visit foreign websites and to order your food online at home, through the same device. SkyVPN is a truly split-tunneling VPN that allows users to customize their network traffic in a smart and simple way.
To enable split tunnel feature on SkyVPN for Windows, you should conform to the following steps:
Step#1. Tap the menu icon at the left upper corner of the main interface.
Step#2. Tap “Advanced” to enter all advanced features of SkyVPN.
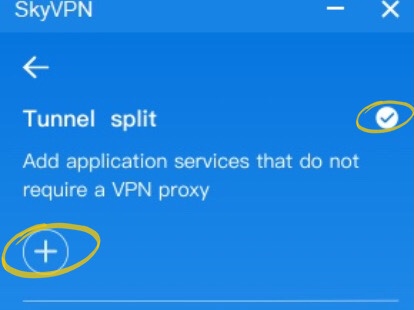
Step#3. Tap “Tunnel Split” to enter the setting page.
Step#4. Tick “Tunnel Split” function and add the websites by tapping the “+” icon so that the added websites don’t go through VPN.
- How to Watch This Year’s Kentucky Derby Online
- How to Watch the 2023 Oscar Award Ceremony Online
- How to Watch the 2023 Masters Tournament Online
- Get Ready for NCAA March Madness Online Anytime and Anywhere
- How to Stream Daytona 500 Online Anywhere and Anytime
